


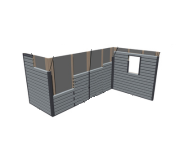


Looking for advice on how to install your Gabion panel?
Our Gabion panel is inserted very easily between two sanded-finish fence posts.
N.B.: Gloves must be worn to handle all components, and it is advisable to have two people present.
Step 1: Positioning the posts
- Ensure that the posts are installed precisely in accordance with the centre-to-centre distances (see PU33).
- For installation with concrete embedding, the embedding depth must be 500 mm (total length of posts: 2315 mm).
- For more details on installing posts, refer to PU11 - Silvadec fencing.
Tip: to prevent any centre-to-centre distance errors, it is advisable to use the Gabion panel as a jig, inserting it two-thirds of the way, before embedding the posts or fastening the post supports.
- For how to insert the grille onto the posts, refer to step 2.
In the special case of installing on double-shell post supports (accessories in the sanded-finish range only), you need to cut some of the wires at the bottom of the grille. The cutting can be performed using cutting pliers for metal wires 2.5 and 4 mm in diameter, or pincers. If disc cutting, make sure to protect the edge with an anti-corrosion retouching paint.
For fencing less than 1.8 m tall, the vertical rods of the gabion grilles can be cut to reduce the structure to the desired height. This cutting can be performed using cutting pliers for metal wires 2.5 and 4 mm in diameter, or pincers. If disc cutting, make sure to protect the edge with an anti-corrosion retouching paint.
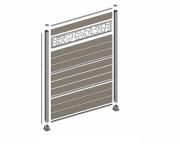
Step 2: Installing the Gabion panel
- The panel is inserted into the rabbet in the post.
- The folded parts of the grilles must be at the bottom, and must rest on the ground or the post embedding pedestals.
- Place the Gabion panel above the posts, and slide it downwards in the rabbets in the posts.
- We strongly recommend having two people present for this step, and using a step ladder.
- For more information, refer to PU33